

Key Details In Carpentry Skills Every Woodworker Should Know
- Pinto Carpentry
- Oct 21, 2025
- 7 min read
Today on the blog, we’re going to share several of the most basic categories of knowledge every budding carpenter or woodworker should know. We’ll be covering different cuts, holes, drill bits, planers, and adhesives required for joinery and finishing. Learn all about the different tools of our field used by everyone from general carpenters, framers, joisters, rail and stairs installation, finish carpentry, woodturners, and even cabinet makers. Soon, you’ll have enough knowledge to nearly be able to host your own HGTV show!
Let’s learn more about key details in carpentry skills together.

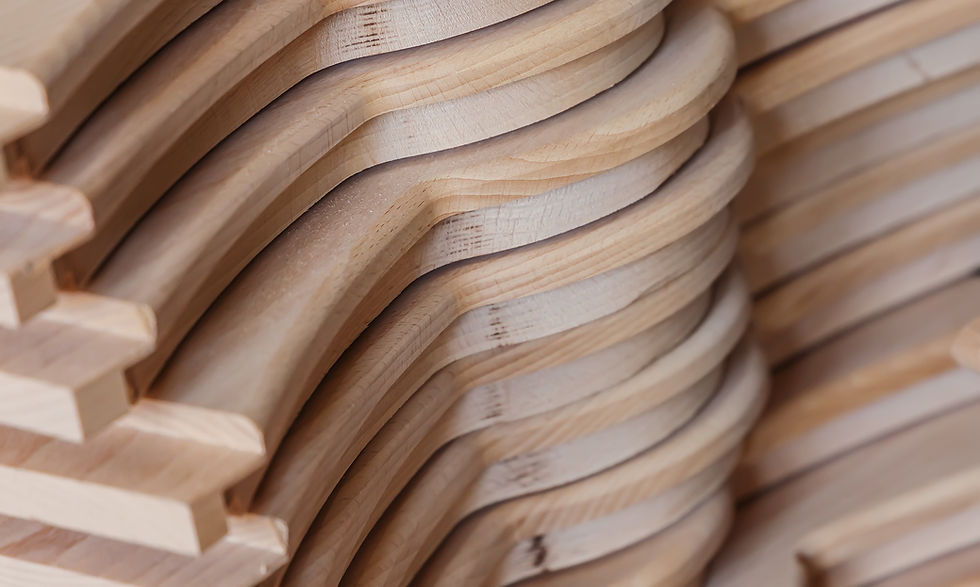
A carpenter needs to understand different cuts and when they are applicable.
Cutting is one of the most essential skills in carpentry, and vital to being able to properly join pieces of wood for a stable build. Let’s go over the different cuts used in carpentry and woodworking!
Scoring - A preliminary step in the cutting process by making an indentation or shallow cut/groove into a surface to improve accuracy when making the final cuts.
Rip Cut - A rip cut is the most basic of cuts, created parallel to or “with the grain” of the material. This is used to reduce the width of material.
Dado Cut - This creates a slot, groove, or trench in the wood that runs perpendicular to the grain. It is a U-shaped slot in the wood that is flat and squared.
Miter Cut - A Miter cut allows woodworkers to create seamless joints and corners, and is generally cut at 45º angle.
Mortis and Tenon Joints - This is a two part process involved in cutting a slot or mortise into one piece of wood and a tenon or tongue piece that slides into the former. It is one of the oldest techniques of joinery in the business.
Bevel Cut - This cut is made along the edge or thickness of the wood allowing for angled edges and a cut that is not 90º. Often used to increase safety and reduce wear and tear.
Dovetail Cut - This is not only one of the strongest wood joining methods, but also one of the most aesthetically beautiful. It features interlocking pieces or pins cut into the wood to interlock with a “tail” cut into the end of another board. When fitted together they create one of the most elegant and stable methods of joining wood.
Thumb Push Cut - A manual wood-carving technique where you make deep, controlled cuts into the wood by using your non-dominant thumb to aid in pushing the knife blade forwards into the wood, while holding the knife in your dominant hand.
Paring Cut - Using a chiselor related small hand tools, and a lot of patience, you’ll remove thin laters of wood and fine tune your adjustments for a smooth finish. This is great for fitting pieces into tight spaces and cleaning up joints with careful precision.
Stop Cut - Utilizing a straight cut to create a clean line and stop another cut from going further than you intend. Great for defining layerse and most often used in whittling.
Other specialty cuts include a rabbet cut, compound cut, jigsaw cut, plunge cut.
Understanding how to properly cut lumber and materials at different angles and measurements means you can create unique projects to fit any space. Knowing how to use hand carving tools, a hand saw, and powered cutting options is essential. Understanding when to use which option will help you create more skilled builds.

Get very familiar with your drill and the type of bits required to join wood and bore holes, slots, and housings. Carpenters and woodworkers should know how to create a blind hole, through hole, holes to house hinges, pocket holes, holes with a countersink for screws and bolts with flared heads to sit flush, etc. Let’s take a look at what each of those types of boring does for the carpenter’s process!
Blind Hole - This type of hole is drilled to a specific depth or recess, but it does not penetrate all the way through the material to the other side.
Pocket Hole - This involves drilling a hole at an angle of generally 15º into one piece of wood and joining it to a second piece of wood with a fastener. This generally creates a strong joinery method.
Countersink Hole - This type of hole is a conical depression or cut created around a hole. Generally, this is used to allow the fastener to sit slightly below the surface for a smooth appearance.
Through Hole - Just like it sounds, this is used for drilling completely through a piece of material from one side to the other. Most often this type of hole is used for joining two pieces with dowels, pins, or other hardware. Additionally, some through-holes may be purely decorative and used to allow light to shine through.

Familiarize yourself with the types of drill bits and what general purpose and type of hole each one is for. Understanding what drill bit is required for the project means you’ll create something stable and durable; the size and material of the drill bit you’re using depends on the lumber or building material the project requires; selecting the right type of bit can prevent you from damaging or burning the materials, and give you the finish quality you desire. Depending on the scale of the project, a carpenter may use a standard corded or cordless hand-held drill, a boring machine, impact driver, drill press, etc.
Twist Drill Bit - The most commonly used drill bit for all-purpose use.
Bradpoint Wood Drilling Bit - A better choice for accuracy in drilling holes thanks to its sharp point on the end that helps anchor and position the bit for a more precise hole creation.
Spade Bit - These are used for boring larger diameter holes in wood. Some may have a perfectly flat face, as is traditional, but specialty spade bits may have a slightly curved face and specialty self-feed tip for assistance.
Auger Bits - This type of bit allows the tip to quickly pull the bit through heavy wood or plastic for deep, clean holes.
Self-Feeding Bit - This is meant for drilling larger more aggressive through-holes in wood, thanks to the threaded tip similar to that of an auger bit. They also generally have cutting teeth and cutting heads to help them along.
Countersink Bits - These specialty bits pull double duty by drilling the pilot hole and a countersink hole at the same time.
Forstner Bits - These help create flat-bottomed holes for setting up hardware like hinges.

Understand the use of sanders and planers for shaving and smoothing wood surfaces. A planer is an incredibly versatile tool for all carpenters, and a classic inclusion in any woodworkers toolbox. It can be utilized to shave down a micro-thin layer of wood more precisely than a sander. A hand plane can help slice the edge of your lumber to accurately fit a cabinet door, drawer, door into a frame, window trime, molding, baseboards, etc. These generally range from 6 to 14 inches long, with a handle on the top and a flat bottom edge with a razor-sharp blade known as the “shoe” of the plane. It’s also important that you understand how to maintain the sharp blade on your hand plane by keeping in mind the grain of the wood you’re cutting, and regular sharpening and oiling of both sides of the blade. Knowing when to use a handplane versus a sander is key! Sanding can help smooth out your wood surfaces, remove blemishes and scratches or dents, prepare the wood for finishing, and can help paint adherence.
Block Plane - Typically used for planing the end grain for more detailed work. They’re affordable, easy to maneuver, versatile, and compact.
Bench Plane - Used for leveling and smoothing wood to a very high end finish. Great for smooth, broad wood surfaces and narrow edges. It’s a very versatile tool and includes jack planes, smoothing planes, and jointers. It requires a workbench to use properly and safely.
Router Plane - Used to cut grooves, dados, and string inlays as well as assisting in cleanup of moritse and tenon joints. This is meant for fine tuning and finessing detailed places.
Shoulder Plane - Also known as a bullnose plane, this is used for fine-tuning especially for trimming the shoulders of a tenon, or the faces of dadoes or rabbets. It creates clean, crisp edges ensuring a tight fit.
There are several more types of planers and specialty hand-planes with more nuanced purposes, but the above should cover the beginner Carpenter and woodworker for now!
Understand the nuances of each type of adhesive or glue required for different joinery and connecting methods or repairs in carpentry work. Most woodworking glues will create an immensely strong bond that is as strong or stronger than your lumber material, meaning almost all options will yield a durable bond for just about any project. Let’s break down the types of glue most commonly used.
Yellow Glue - This versatile glue is made of aliphatic resin or PVA. It’s applicable for most gluing tasks, but has an extremely short active working time of about 5 to 15 minutes total.
Hot Hide Glue - This adhesive is crafted from animal proteins, and has a very short working time if it reaches under 120 degrees. It’s not very forgiving
Liquid Hide - A forgiving glue that allows up to 30 to 45 minutes of working time. The trade-off is that it has a long cure time for clamping, and is best to leave for a minimum of 6-12 hours, or overnight.
Urea Formaldehyde- Used most often for tasks like lamination or veneers.
Epoxy - Can be used to fill in holes, gouges, nicks, and knots as well as marrying two pieces that are not easy to attach; depending on the hardeners used, it can have a working time of 5 to 60 minutes, with clamp times of 45 mins to overnight.
Cyanoacrylate - Creates an instant bond and dries very quickly; it is best for non-structural and quick repairs only.


Comments